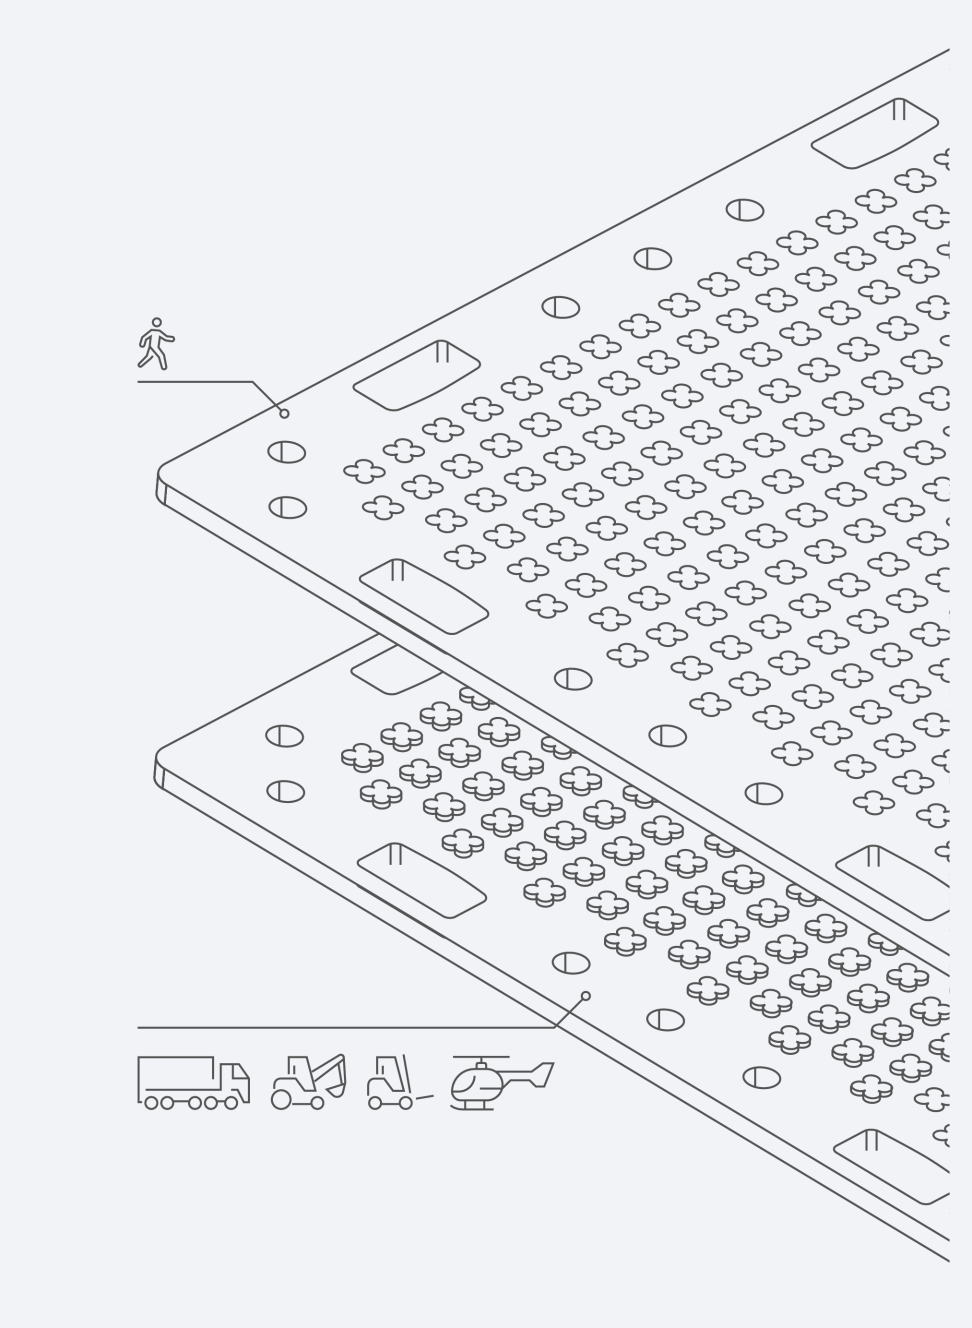
EASY ASSEMBLY IS ONE OF MANY ADVANTAGES OF ROAD PLATES ROAD SYSTEM
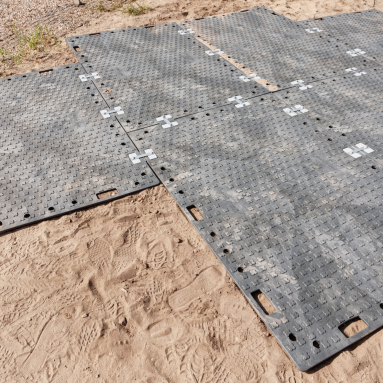
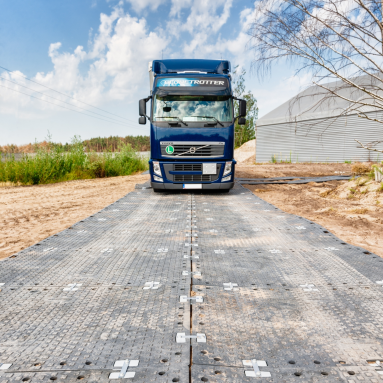
The undeniable advantage of the product is simple and quick installation for any type of application. Single ROAD SYSTEM road plates made of plastic are fastened together into larger pavement structures by special fasteners, fixed to the plates with two screws. The system of fasteners takes into account the minimum dilatations resulting from the natural processes of shrinkage or expansion of plastic under pressure and weather conditions. There is no need to make any special foundation before installation, but it is recommended to lay temporary roads on an even surface. In the case of swampy, marshy or muddy terrain, it is helpful to use a road geotextile (eg Typar SF49) as a substrate stabilizer for road plates.
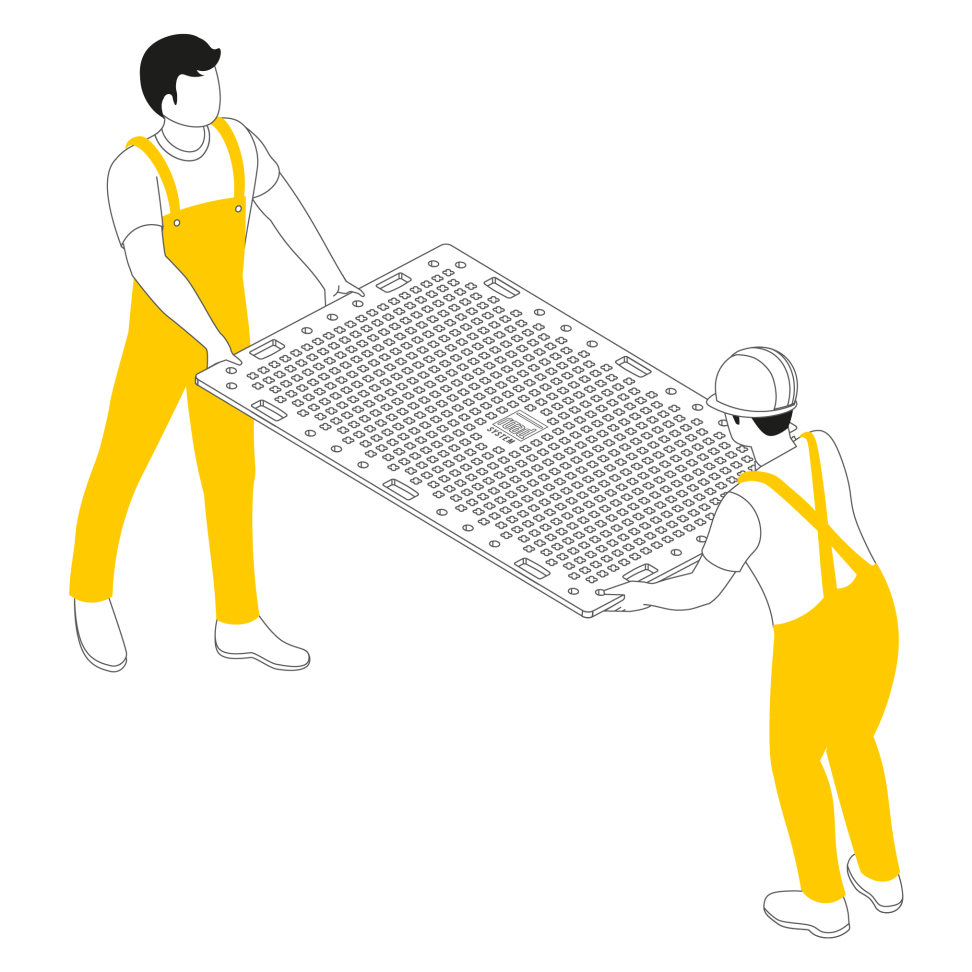
The weight of one plate is 27/37/85 kg. The plate can be carried by 2 people - with convenient handles. Within 8 hours of the team's work, it is possible to lay about 500 m of a 3 m wide road.
1.
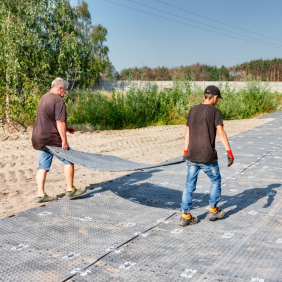
Lay the plates on level ground
The area which the plates will be installed on should be leveled and cleaned of stones. With intensive use of the temporary road, on weak native soil and marshy terrain, the ground may require a few centimeters of bedding made of crushed stones.

For muddy and boggy areas, it is recommended to lay plates on geotextile. It will protect the plates against contamination and sinking into mud.
2.
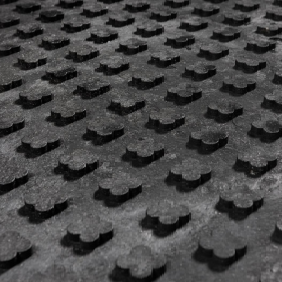
Pay attention to the side of plate you are paving on.
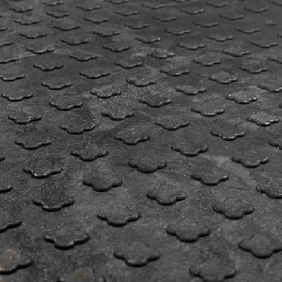
The 125 and 200 ROAD SYSTEM boards are designed as two-sided which makes them universal in use. The lower anti-slip protrusions are intended for pedestrian traffic, the higher ones for wheel traffic. Find out how to lay the plates. ..
3.
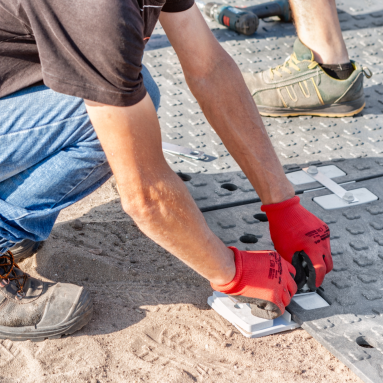
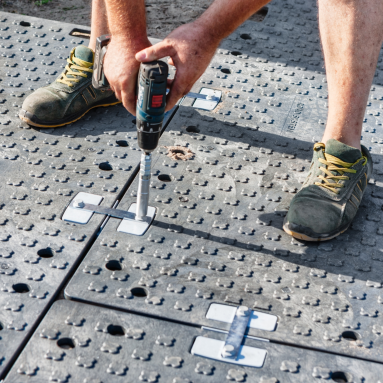
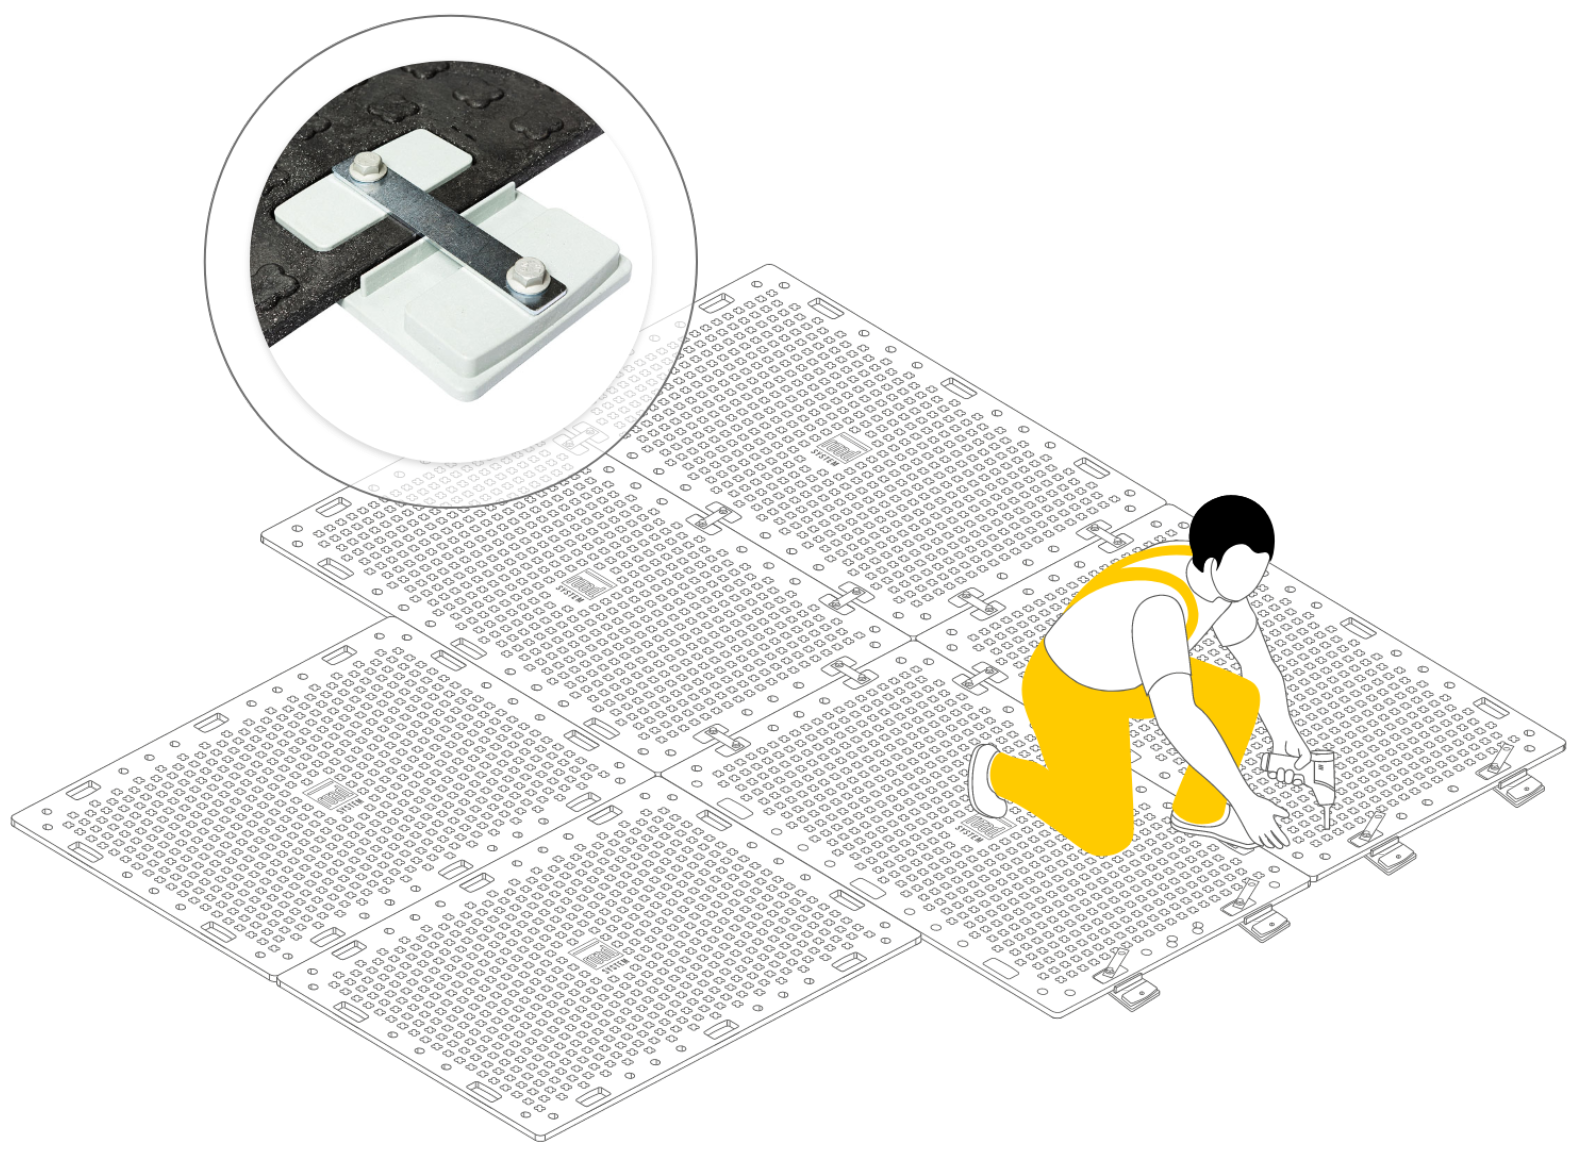
Insert the connectors
In the plate you will find holes specially dedicated to connectors.
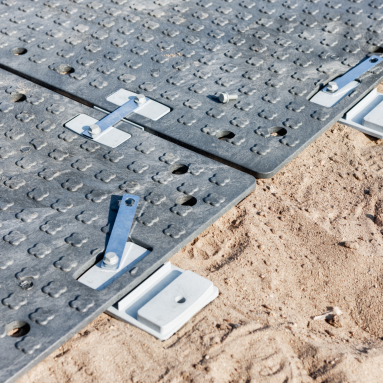
4.
Fasten the connectors
Fasteners are attached with screws - one on each combined plate.
5.
Connect the plates
You can connect the plates in a classic way, as only lanes under the wheels, or alternately (only RS125 and 200).
Dilatation
Due to the properties of the material, which expands at high temperatures and shrinks at low temperatures, it is necessary to maintain expansion joints. The plates should be laid with a distance of approx. 3-5 cm from other surfaces (curbs, posts). When connecting panels, the expansion function is performed by a connector which in its structure has an additional space for expansion and contraction of the material.
6.
Uneven surface
After laying, the plates adjust to the unevenness of the surface.
7.
The surface is ready for use
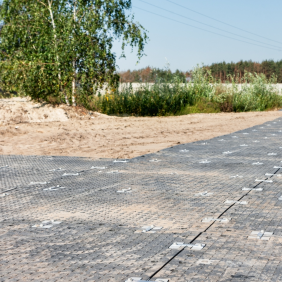
You can now fully use the potential of ROAD SYSTEM plates.
Depending on the type of temporary road, the plates should be laid in accordance with the recommended diagrams.
Plate laying methods, i.e. how many connectors do you need
The plates can be joined together in a classic way, as only lanes under the wheels, or alternately, as it is possible to join their shorter sides.
Classic layout
The plates can be laid along their width (1.2 m) or length (1.8 m or 2.4 m) by joining them with connectors in larger planes.
Wheels lanes
In this case, two separate lanes can be laid. This is an economical solution - you place the plates alongside, with a gap between them.
Alternate layout
This arrangement applies to the RS 125 and 200 plates. The RS 400 plates can be joined this way, but only with the use of hooks.
ROAD SYSTEM road plates are delivered on 180x120x100 cm or 240x120x65 cm pallets.
A single pallet weighs up to 1,000 kg
They are unloaded sideways, a forklift must be provided for unloading
In vehicle traffic, it is necessary to connect the plates with the ROAD SYSTEM LINK 125, 200 or 400 connector. The connector has 2 screws that need to be twisted - preferably with a screwdriver.
The plates can be additionally attached to the ground with RSL U steel hooks
For pedestrian or bicycle traffic, you may use fewer RSL 125, 200 or RSL U steel hooks to connect the plates.
Due to the hardness of the ground, the plates cannot always be attached with RSL U hooks